CASE STUDY
Permanent LIP COLOUR
Dr Shikha Baghi Bhandari presents a case study detailing the procedure to lip micropigmentation.
Dr Shikha Baghi Bhandari
Dr Shikha Baghi BhanDari
Dr Bhandari, Founder & CEO, Timeless Aesthetics, graduated from amritsar and pursued her Post graduation in MDS from Pune. She has brought internationally approved facial aesthetic and PMU procedures to india. She has undergone extensive professional training from Europe and Scandinavia while her most recent training was with a german trainer. She aims to work with those affected by a multitude of ailments including alopecia, cancer, and vitiligo.
P ermanent makeup or semi-permanent tattoo is an aesthetic technique where the professional artist introduces pigments (organic and inorganic material) to skin to give it saturated and more enhanced coloration. The commonly used areas for permanent makeup are the lips, eyebrows, eyeliner, scalp, and there is a medical side of it as well where conditions such as alopecia and vitiligo are treated.
PERMANENT LIP COLOUR V/S BROWS: NOT THE SAME!
Contrary to the popular belief, permanent eyebrows and permanent lip colour are not the same for multiple reasons: Both have a different surface structure, different healing times, different techniques and equipment, different colour theory, and the mapping techniques are different too. hence, we advise our patients to make sure their artist is certified for both and has a substantial portfolio before sitting in their chair.
• Procedure: Permanent Lip Color (Lip Micropigmentation)
• Condition: Two tone lips (brownish pigmentation on upper lip)
• Clinic: Timeless aesthetics, gurugram
• Artist: Dr Shikha Baghi Bhandari
CONSULTATION
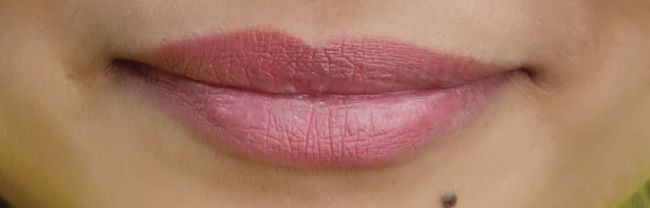
The procedure begins with determining the extent of change that needs to be implemented. This involves a thorough examination after which treatment options are discussed. in this case, there was a clear brown pigmentation on the upper lip that can be caused by multiple reasons but that is another topic. This discoloration was quite visible or noticeable. The decision was made that a gentle pink colour will be more suitable given the overall complexion of the client.
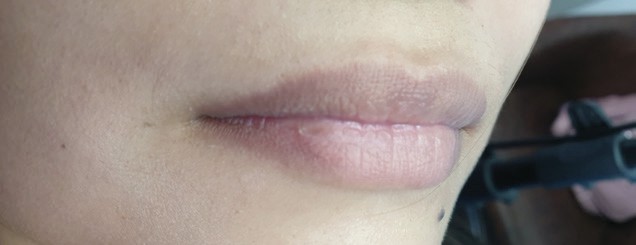
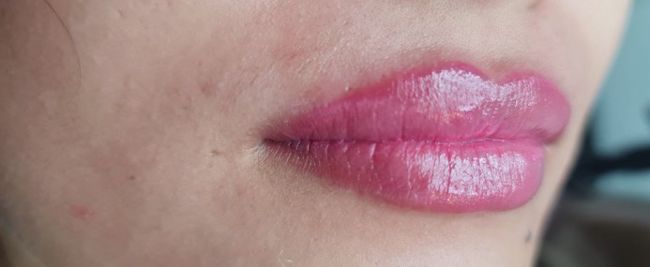
Before (Side Profile)
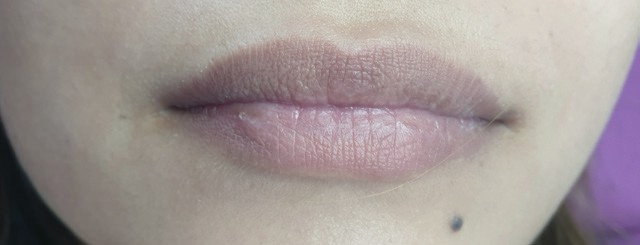
Before (Front Profile)
Mapping
We started out with mapping, which is pre-op marking and designing of the area. This step allows us to determine the shape of the lips and visualise what to expect post-op. We defined the Vermillion Border (the line just above the coloured portion that connects the lip tissue to the rest of the face), Cupid’s Bow (facial feature where the double curve of the upper lip is) and of course Oral Commissures (corners of the mouth). Another major element of the mapping is to define the area limits both outwards and inwards.
Colour Theory
Pigments are not like crayons where you can pick your favourite colour and start applying it. Instead, we have to mix pigments to find the proper colour 99 per cent of the times. Here, we chose two separate pigments in various quantities to develop the pink colour that the client asked for. Colour neutralisation is just as important as applying the new colour. The colour of choice is always kept light in its depth because it needs to be slowly built layer by layer. This allows the lips to heal decently without any scarring. (Something that is overlooked quite often, sadly.)
Numbing
A local anaesthetic applied to the lips to numb the area takes a little time to set in. During this time, we closely monitor the client in case of a reaction or if we need to wait a bit longer.
Micropigmentation
Most of the artists, who do not research or have not studied up on the methods would believe that one needle would do it all. However, that is completely incorrect. For instance, in this particular case, we used three different needles to complete the procedure:
• 1R Needle for contour (shaping)
• 3R Needle for shading
• 7F Needle for blending
Furthermore, we used Timeless Wonder (in-house proprietary micropigmentation machine) with various settings during the procedure.
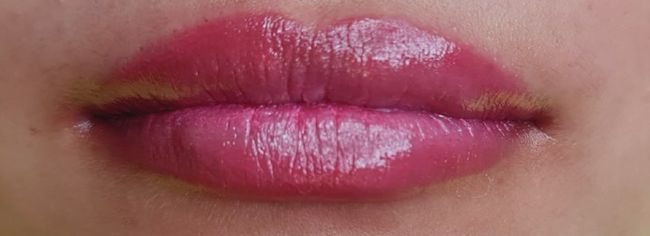
Lip Neutralisation and colour after first sitting
The technique used during this treatment carries a lot of careful variables. Applying colour to the lips in one go, or without altering levels of pressure or even using a singular needle for contours, blending and shading is simply incorrect, and dare I say, incompetent on the artist’s part.
Post-Op Expectations
Dark lips + Swelling: The colour appears quite vivid immediately post the procedure but there is nothing to worry since that is an expected outcome. There will be swelling post the procedure, which is also normal, however, the duration and intensity of the swelling depends on the skin type. Also, if the client has had a lip filler procedure done prior to this, the swelling will be a bitintense and may stay for a while. This is why, we always advise that the fillers to be done about four weeks before the lip micropigmentation. The swelling will subside within the day as it is nothing but the body’s immune response to the procedure.
Scabbing: By the third day, the lips will start to scab, which is why it is extremely important to advise clients not to scratch or try to peel the area. Let it heal on its own, which it does. This transition subsides by the seventh day, like it did in this case.
External healing vs. internal healing: The external healing period is about seven days while the internal healing takes somewhere from 30 to 40 days. During this time, we do not advise takes somewhere from 30 to 40 days. During this time, we do not advise patients to go through any other lip treatments of any even a spa. There is a list of dos and don’ts for the patients where we clearly explain what sort of medication they can take, the kind of ointment or balms that are suitable for them and how to avoid certain applicable cosmetics, even cleansing routines to keep the area clean and safe.
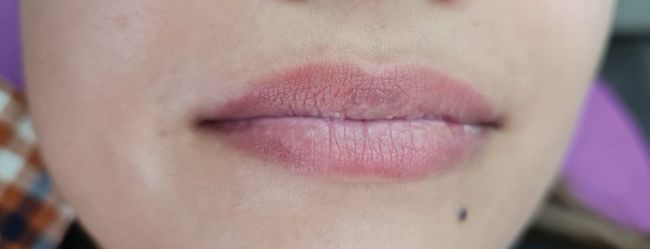
Healing after 45 days post treatment
*In case the patient likes to opt for both lip filler and permanent lip colour, we the suggest the permanent makeup treatment first, and after two weeks, they can safely receive the filler. In case the lip filler has been opted for beforehand, we would wait for four weeks at least before the permanent lip colour is applied. At times, due to wrinkly or dry lips, we suggest taking the fillers before the permanent lip colour to give it a better texture and surface to work on.
Follow-Up or Touch-Up
Once the transition period of healing ends, the client is called for a touch-up. We examine the progress and healing of the lips. Certain areas are retouched in case the pigment was not filled in properly.
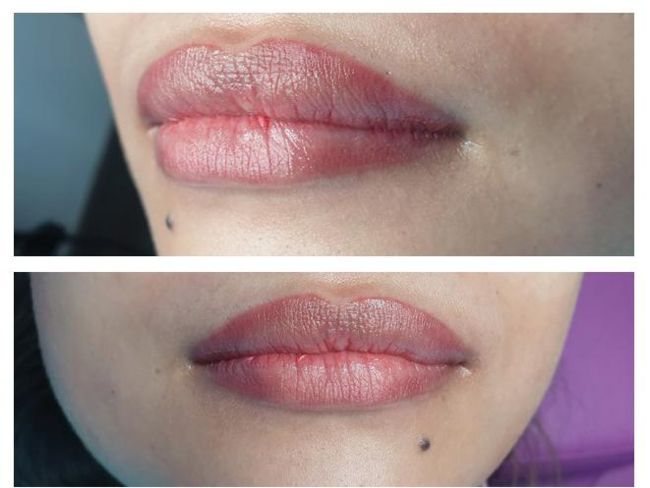
Immediately after second sitting
Healed after second sitting
Immediately after third sitting
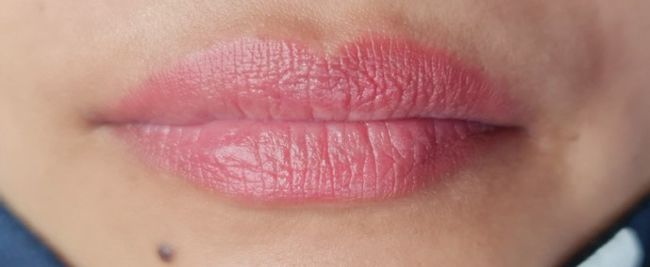
Final healing
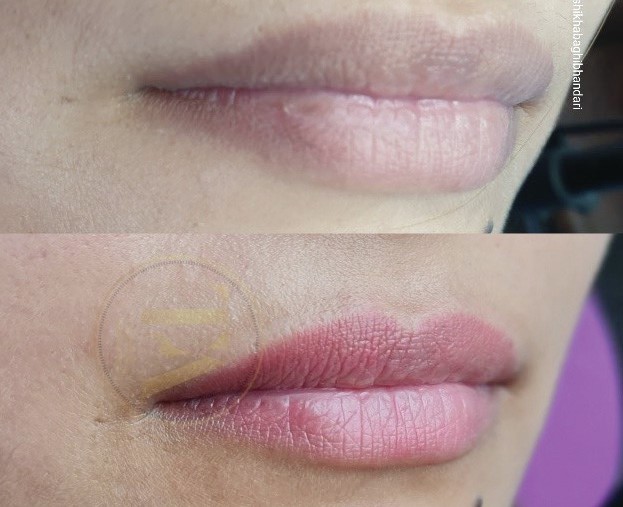
Before and after
Potential Complications
Generally, there are no serious complications associated with the permanent lip colour procedure. However, if the patient is on blood thinners and fails to mention it during the examination, that can be a problem. On the other side, if the artist is not well-versed in the techniques, they can end up giving an unnatural and uneven colour to someone’s lips or cause serious damage to the lips.
In many cases, not taking care of preprocedure measures such as mixing the colour correctly or deciding which needle to work with, or a below average technique, can cause bleeding and scarring which cannot be operated on afterwards. Any visible bleeders are simply a big ‘no’. At Timeless Aesthetics, we do not use any pre-set treatment techniques or protocols. There are general safety and hygienic guidelines that are mandatory but other than that, we devise a treatment plan for each patient according to their need and our expert opinion.